Hematoxylin and Eosin (H&E) Staining
Hematoxylin and eosin staining is the most commonly utilized histological stain due to its relative simplicity and capacity to highlight a vast array of tissue structures distinctly. The staining can be conducted using either progressive or regressive protocols.

Figure 1: Automatic slide strainer
Hematoxylin and Eosin (H&E) Staining Procedure
The Hematoxylin and Eosin (H&E) staining technique is essential for visualizing histopathological tissue structures. Below are the steps specifically involved in the staining process:
Step 1: Deparaffinization and Rehydration
Before staining, paraffin must be removed from tissue sections:
- Deparaffinization: Slides are immersed in xylene to dissolve and remove the paraffin.
- Rehydration: The tissue sections are rehydrated by passing them through decreasing alcohol concentrations (absolute ethanol to 70% ethanol) and finally rinsed in water.
Step 2: Hematoxylin Staining
Hematoxylin is a basic dye that stains the nuclei of cells blue-purple:
- The slides are immersed in hematoxylin solution for a specific period, allowing the dye to bind to the nuclear material.
- After staining, the slides are rinsed in water to remove excess dye.
Step 3: Differentiation
This step removes non-specifically bound hematoxylin to enhance contrast:
- Slides are dipped in an acid alcohol solution (usually 0.3% hydrochloric acid in 70% ethanol), selectively removing excess hematoxylin and highlighting the nuclei.
Step 4: Blueing
Blueing stabilizes the nuclear staining:
- Tissue sections are treated with a weak alkaline solution, such as lithium carbonate or ammonia water, which converts the reddish-purple hematoxylin to blue.
Step 5: Eosin Staining
Eosin is an acidic dye that stains the cytoplasm and extracellular matrix components pink:
- Slides are briefly immersed in an eosin solution, which allows the dye to bind to various cellular components.
- Eosin contrasts the blue nuclei stained by hematoxylin, highlighting other cellular and tissue structures.
Step 6: Dehydration and Clearing
After staining, the tissue sections need to be prepared for mounting:
- Dehydration: The sections are passed through increasing concentrations of alcohol.
- Clearing: Sections are then cleared in xylene to prepare them for mounting.
Step 7: Mounting
Finally, a coverslip is placed over the tissue section using a mounting medium (e.g., Permount or DPX), preserving the stained tissue and allowing for microscopic examination.
This staining process is crucial for producing detailed histological images, enabling clear visualization of tissue structures for diagnostic and research purposes.

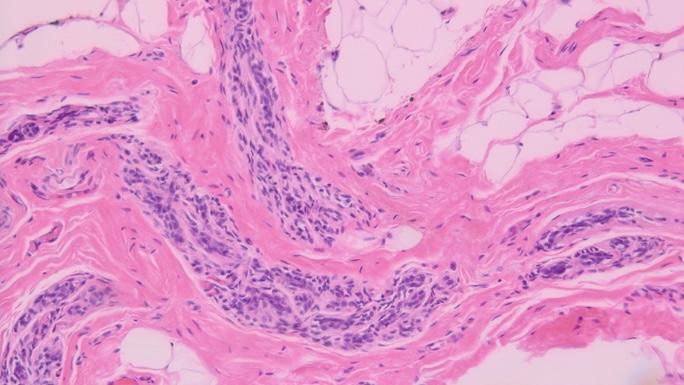
Figure 2: Hematoxylin and Eosin (H&E) Stain
This figure illustrates a typical histological section stained with Hematoxylin and Eosin (H&E).
- Hematoxylin: Stains the cell nuclei blue-purple, highlighting the nuclear material and chromatin structures. The staining clearly delineates the nucleus and allows for the observation of nuclear morphology and abnormalities.
- Eosin: Stains the cytoplasm, extracellular matrix, and other tissue components pink. This contrast provides a detailed view of the cell cytoplasm and extracellular structures, enhancing the overall tissue architecture.
The combination of these stains allows for comprehensive visualization of tissue histology, facilitating the identification and analysis of various cellular and tissue elements. The clarity and differential staining enable pathologists and researchers to diagnose diseases and conduct detailed tissue studies.


Leave a Reply